Fierce - Little Red Riding Hood Set
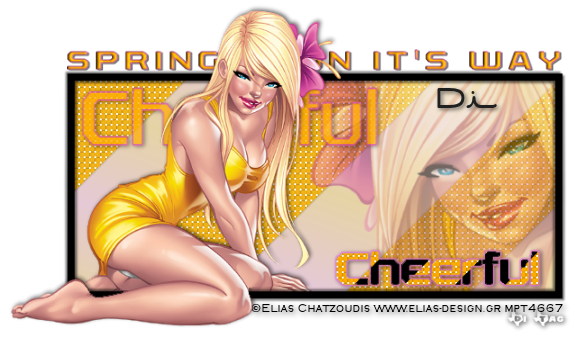
Cheerful - Spring is on it's way
Remember to SAVE often.
Plugins used
Vanderlee Unplugged is name for download
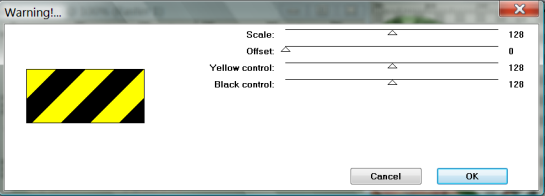
( Unplugged Shapes - Warning )
EyeCandy3 glow
Font of CHOICE (name)
Font used for Wordart Rexlia download HERE
Your Tube of CHOICE.....
Tube I used is Elias Chatzoudis can
be purchased HERE
Remember tuts are just guides.
As always improvise and personalize!
File New 550 x 250
Copy and paste close up of your tube
to one side.
Choose two colors from your tube.
Add New raster layer move too bottom and
fill with FIRST of your color choices.
Add another New raster layer go to Gradients
using the gradient mixer using your color
choices and fill it with your gradient color.
Selections
Select ALL
Image
Crop to Selection
Hightlight FIRST color choice layer
Hide your tube layer,
Effects
Plugins
Unlplugged SHAPES
Warning
See image below for settings 128 , 0 , 128 , 128
Next - Magic Wand the yellow parts
fill with FIRST color choice,
see image below
Then use CHOICE of texture. Try several to
see which you like.
Next - INVERT and CLEAR you will have this
Add new raster layer and fill with white.
Send to bottom.
Highlight your gradient layer and set opacity
to your liking I set mine at 30 so just barely
hit of the gradient color shows.
Unhide your tube layer and set opacity at 50.
Four layers in all at this point all UN-HID
Merge VISIBLE
Image
Canvas Size
635 x 400
Copy and Paste your full size tube to the
opposite side your have your close up.
arrange to suit you.
Go to your merged background layer...
Selections
Select all
Float
Modify
Add New Raster layer
Select Selection Borders
setting Inside Ticked only
- Anti-Alias Checked -
Border W 8
fill with FIRST Color choice.
Still Selected
Add drop shadow
H2, V2, Op50, B3 Color Black
Drop Shadow again
H.2 V.2 Op50 B3 Color Black
Same layer Adjusts
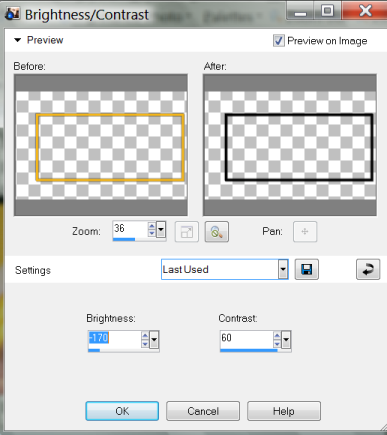
Brightness and Contrast see image below for setting on darkening the frame.
Adjust to your liking.
Selections
Select None
Highlight your Tube you just added.
right click and Double. Hide orginal
tube layer.
Move duplicate behind your frame layer.
With magic wand go to your background
layer and click outside your background.
With it still selected go back to your tube
layer copy below your frame and DELETE
the parts outside frame.
Selections
Select None
Unhide original tube layer and carefully
cut out the parts you want to stay behind
the frame using selection tool rectangle and
your wand ....
Its just a small part look at examples below
and above to decide how much you want
to hide behind frame. Gives illusion tube is
coming out of your frame.
Once satified with tube position , shadow top
original tube layer only using settings
H -2 V 2 Op 55 B 7
Hide top tube layer and Merge visible the other
layers. You should have only 2 layers now.
The orginal tube layer and background.
Add new raster layer above your background layer
for your Word art.
Choose anyword you like which matches
the tube. I have two samples below and
the orginal Above.
Place accordingly ... Larger version of word
behind full tube small version over the close up.
Using your two original colors Lighter color being
the outline size 2 - word size 85
Convert to Raster
Move behind original tube layer to satifaction.
Set opacity on larger word to 75
Drop Shadow H1 V2 Op 50 blur 7
Small word type size 42 - outline 1
Convert to raster
Place in front of close up tube.
Seletions - Select all - Float
Effects
Plugins
Unplugged Shapes
Warning
Select None
Now carefully using your wand select all the Yellow
Parts of your word ... fill with your FIRST color choice
then use same texture as used background.
Selections - Invert - fill grey parts with black.
Selections
Select None
Effects
Plugins
Eye Candy 3
Glow
Using your SECOND color choice
settings
W 3 Op 80 Fat
Drop Shadow H1 V2 Op 50 blur 7
Behind original tube layer
Type saying stretched out to length of frame.
using Black or Original colors whichever shows up better.
Size 28 set kerning so it stretched out.
For the "Cheerful Tag" I set mine at 175 (example below)
Effects
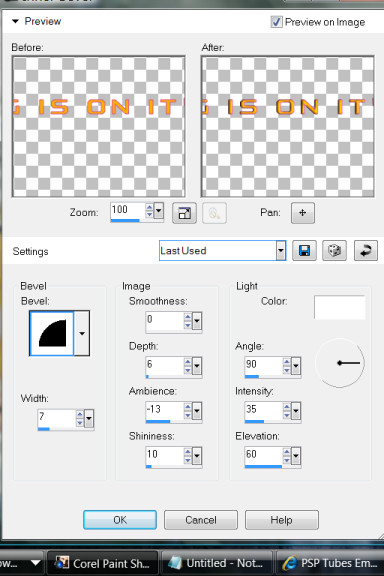
Inside Bevel (see image for setting below)
Drop Shadow H1 V2 Op 50 blur 0
Crop & resize if you choose
Add All copyright Information
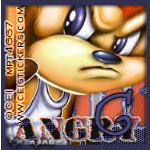
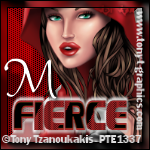
AVATAR
On the Tag Banner you just made
Using your Seletion Rectangle
Choose what you want to use for your Avatar
see samples below.
Measure out a 150 x 150 selection
(shows sizes on very bottom of program window
as you use your selection tool)
Copy Merged
Paste as new Image
Selections
Select all
Float
Modify
Add New Raster layer
Select Selection Borders
setting Inside Ticked only
- Anti-Alias Checked -
Border W 5
fill with FIRST Color choice.
Still Selected
Add drop shadow
H 1, V 2, Op40, B3 Color Black
Drop Shadow again
H -1 V -2 Op40 B3 Color Black
Select None
Copy your smaller word from your tag banner
and resize it to fit on Avatar.
Paste and place to satifaction.
Now you can MERGE VISIBLE ON BOTH
TAG BANNER AND AVATAR
Add All copyright information
Add Name to Tag Banner and Intial to Avatar
or name if you wish lol
I know kinda long for my first tut.
Sorry!! Tee Hee NOT! (could not help myself lmao)
Enjoy!
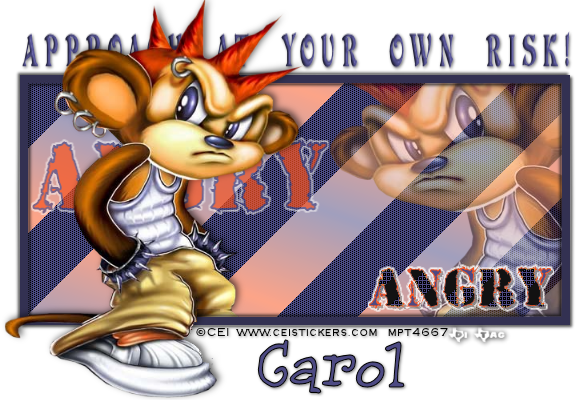
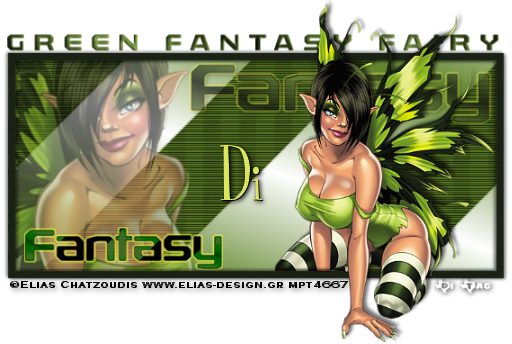
More Samples
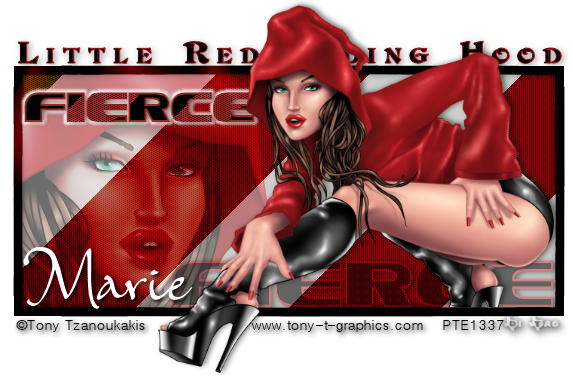

This tutorial was written by ... 
Plugins used
Vanderlee Unplugged is name for download
( Unplugged Shapes - Warning )
EyeCandy3 glow
Font of CHOICE (name)
Font used for Wordart Rexlia download HERE
Your Tube of CHOICE.....
Tube I used is Elias Chatzoudis can
be purchased HERE
Remember tuts are just guides.
As always improvise and personalize!
File New 550 x 250
Copy and paste close up of your tube
to one side.
Choose two colors from your tube.
Add New raster layer move too bottom and
fill with FIRST of your color choices.
Add another New raster layer go to Gradients
using the gradient mixer using your color
choices and fill it with your gradient color.
Selections
Select ALL
Image
Crop to Selection
Hightlight FIRST color choice layer
Hide your tube layer,
Effects
Plugins
Unlplugged SHAPES
Warning
See image below for settings 128 , 0 , 128 , 128
Next - Magic Wand the yellow parts
fill with FIRST color choice,
see image below
Then use CHOICE of texture. Try several to
see which you like.
Next - INVERT and CLEAR you will have this
Add new raster layer and fill with white.
Send to bottom.
Highlight your gradient layer and set opacity
to your liking I set mine at 30 so just barely
hit of the gradient color shows.
Unhide your tube layer and set opacity at 50.
Four layers in all at this point all UN-HID
Merge VISIBLE
Image
Canvas Size
635 x 400
Copy and Paste your full size tube to the
opposite side your have your close up.
arrange to suit you.
Go to your merged background layer...
Selections
Select all
Float
Modify
Add New Raster layer
Select Selection Borders
setting Inside Ticked only
- Anti-Alias Checked -
Border W 8
fill with FIRST Color choice.
Still Selected
Add drop shadow
H2, V2, Op50, B3 Color Black
Drop Shadow again
H.2 V.2 Op50 B3 Color Black
Same layer Adjusts
Brightness and Contrast see image below for setting on darkening the frame.
Adjust to your liking.
Selections
Select None
Highlight your Tube you just added.
right click and Double. Hide orginal
tube layer.
Move duplicate behind your frame layer.
With magic wand go to your background
layer and click outside your background.
With it still selected go back to your tube
layer copy below your frame and DELETE
the parts outside frame.
Selections
Select None
Unhide original tube layer and carefully
cut out the parts you want to stay behind
the frame using selection tool rectangle and
your wand ....
Its just a small part look at examples below
and above to decide how much you want
to hide behind frame. Gives illusion tube is
coming out of your frame.
Once satified with tube position , shadow top
original tube layer only using settings
H -2 V 2 Op 55 B 7
Hide top tube layer and Merge visible the other
layers. You should have only 2 layers now.
The orginal tube layer and background.
Add new raster layer above your background layer
for your Word art.
Choose anyword you like which matches
the tube. I have two samples below and
the orginal Above.
Place accordingly ... Larger version of word
behind full tube small version over the close up.
Using your two original colors Lighter color being
the outline size 2 - word size 85
Convert to Raster
Move behind original tube layer to satifaction.
Set opacity on larger word to 75
Drop Shadow H1 V2 Op 50 blur 7
Small word type size 42 - outline 1
Convert to raster
Place in front of close up tube.
Seletions - Select all - Float
Effects
Plugins
Unplugged Shapes
Warning
Select None
Now carefully using your wand select all the Yellow
Parts of your word ... fill with your FIRST color choice
then use same texture as used background.
Selections - Invert - fill grey parts with black.
Selections
Select None
Effects
Plugins
Eye Candy 3
Glow
Using your SECOND color choice
settings
W 3 Op 80 Fat
Drop Shadow H1 V2 Op 50 blur 7
Behind original tube layer
Type saying stretched out to length of frame.
using Black or Original colors whichever shows up better.
Size 28 set kerning so it stretched out.
For the "Cheerful Tag" I set mine at 175 (example below)
Effects
Inside Bevel (see image for setting below)
Drop Shadow H1 V2 Op 50 blur 0
Crop & resize if you choose
Add All copyright Information
AVATAR
On the Tag Banner you just made
Using your Seletion Rectangle
Choose what you want to use for your Avatar
see samples below.
Measure out a 150 x 150 selection
(shows sizes on very bottom of program window
as you use your selection tool)
Copy Merged
Paste as new Image
Selections
Select all
Float
Modify
Add New Raster layer
Select Selection Borders
setting Inside Ticked only
- Anti-Alias Checked -
Border W 5
fill with FIRST Color choice.
Still Selected
Add drop shadow
H 1, V 2, Op40, B3 Color Black
Drop Shadow again
H -1 V -2 Op40 B3 Color Black
Select None
Copy your smaller word from your tag banner
and resize it to fit on Avatar.
Paste and place to satifaction.
Now you can MERGE VISIBLE ON BOTH
TAG BANNER AND AVATAR
Add All copyright information
Add Name to Tag Banner and Intial to Avatar
or name if you wish lol
I know kinda long for my first tut.
Sorry!! Tee Hee NOT! (could not help myself lmao)
Enjoy!
No comments:
Post a Comment